How To Insert A New Symbol In NinjaTrader
- In NinjaTrader 8 a symbol such as CL has an underlying instrument that contains all of CL’s metadata such as its tick size, description, point value etc.
- In order to import data into NinjaTrader 8 there must exist the underlying instrument in the instrument database. The vast majority are there by default, but more obscure or newer symbols may not be.
- NOTE: If you try to import historical data into NinjaTrader 8 when the underlying instrument is not there will cause the import to fail.
- You must setup the underlying instrument FIRST before importing the data.
- If you have purchased data from Portara where the underlying instrument is not contained in the database we will provide you with basic instructions but it IS UP TO YOU to complete the necessary steps and to set things up the way you want it to function.
- First search for the instrument and if it is not there you need to add it:
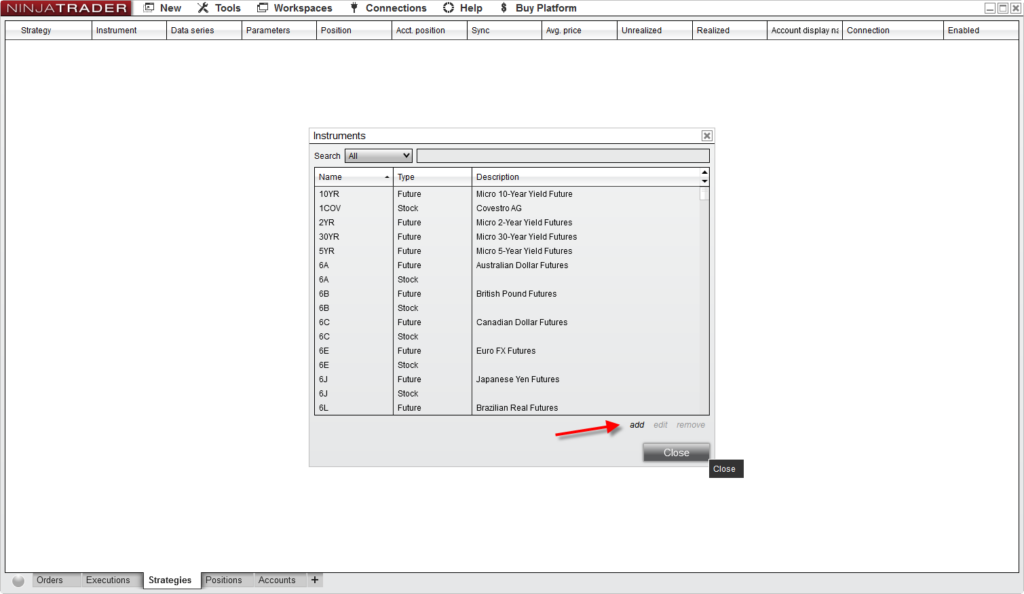
- Complete the boxes like so… according to the metatata you are provided with. In this case TTF requires the following inputs:
- The red arrows are compulsory
- The blue arrows you can tweak if you need to at a later stage.
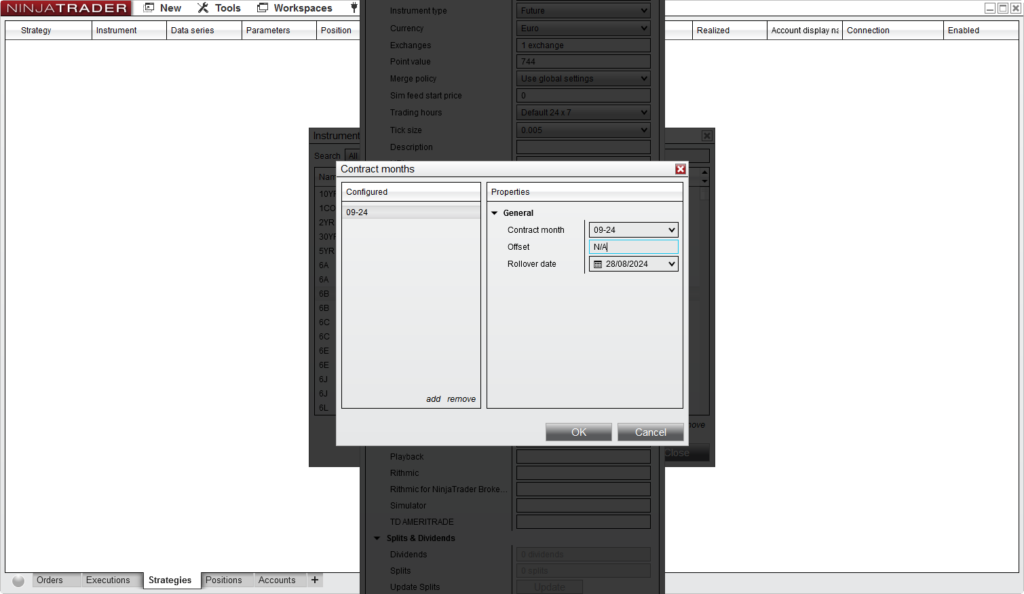
- Depending on your requirements you will need to setup the Contract Months (the lowest red arrow). If you have purchased continuous data then you may only need to setup one row just to satisfy the internal workings of NinjaTrader. However, if you have purchased individual contracts, IT IS UP TO YOU to work your way through these roll settings and apply each setting as you wish to operate. Please remember, we are not NinjaTrader support so we cannot answer questions based upon anything outside of these instructions. If you require any other discussions or verifications you must reach out to NinjaTrader support directly.

The contract Months setup as discussed above needs to be completed according to your requirements. It will nag for at least one completed entry. In this case, where we wish to import continuous data so only one entry is required. In this case we simply chose the default values presented. If you require a full compliment you will need to manually work through these setting them up accordingly.
Once the instrument has been saved you can return to the import instructions in the usual way see here portaraninja.com and choose the section for whatever Installation Notes you require.